Crafting Autumn's Radiance: A Guide to Creating Vibrant Leaf Suncatchers
Illuminate Your Home with the Glow of Fall's Foliage
Embracing the Seasonal Splendor: Why Autumn Crafts Delight
Autumn in the Midwest is truly enchanting, as oak and maple trees blaze with brilliant reds, yellows, and oranges. This fleeting spectacle of color is something many wish to preserve. Crafting a fall leaf suncatcher is a beautiful way to encapsulate this seasonal charm and bring its warmth into your home, providing a simple yet captivating activity for children.
Gathering Nature's Treasures: The First Step to Creativity
To begin this artistic endeavor, embark on a nature walk with your children. Collect a variety of dried leaves and flowers, focusing on those with interesting textures and diverse colors. As you gather these natural elements, it's an excellent opportunity to discuss the life cycle of trees and the reasons behind the seasonal shedding of leaves.
Essential Supplies for Your Leaf Suncatcher Masterpiece
Before you start assembling, ensure you have the following items ready: a collection of dried leaves and flowers, clear contact paper, colorful Sharpie markers (such as gold, silver, red, and black), a pair of scissors, and some decorative punch-out shapes. These tools will help you bring your creative vision to life.
Preparing Your Natural Elements: Pressing and Shaping Leaves
First, carefully press your collected leaves and flowers to flatten them. You can achieve this by placing them inside a heavy book or between two towels with additional heavy objects on top for a few days. Once flattened, draw a desired leaf shape on the non-sticky side of a piece of contact paper. Then, peel off the backing of the contact paper and secure it to your work surface.
Crafting with Imagination: Designing Your Collage
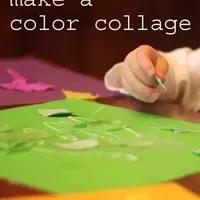
Encourage your child to use a shape puncher to create various cut-outs from the flattened leaves. Heart-shaped punchers are particularly popular for this activity. Experiment with both the positive and negative shapes in your collage for added visual interest. Next, use scissors or simply tear the flowers and leaves into smaller pieces. Arrange these pieces artfully onto the sticky surface within the outline of your drawn leaf shape.
Sealing the Beauty: Completing Your Suncatcher
Once your collage is complete, measure and cut a second piece of contact paper to match the size of your design. Carefully peel its backing and gently press it over your leaf collage, smoothing out any air bubbles to ensure a secure seal. This step protects your artwork and enhances its durability.
Adding the Finishing Touches: Framing and Display
After sealing, trim around each leaf shape, leaving a small border of about half an inch. You can choose to add a decorative frame using permanent markers for an extra flourish, or leave them as is for a more natural look. Finally, arrange your completed suncatchers on a window and secure them with a small piece of clear tape, allowing the sunlight to illuminate their vibrant colors.
Bringing Autumn's Glow Indoors: A Simple and Joyful Creation
This leaf suncatcher craft is a remarkably straightforward and enjoyable project that effortlessly infuses your home with the warm, rich colors of autumn. It's a wonderful way to celebrate the season and engage in a creative activity that yields beautiful, radiant decorations.